

Image by Mohamed Hassan from Pixabay
Introduction
It is the 21st century and we are literally obsessed with data. Data seems to be everywhere and companies currently hold huge amounts of it regardless of the industry they belong to.
This brings us to the problem of storing data in a way that it can be accessed, processed, and used efficiently. Before cloud solutions, companies would have to spend a lot of money on physical storage and infrastructure to support all the data the company had.
Nowadays, the more popular choice is to store data in a cloud as this is often the cheaper and more accessible solution. One of the most popular storage options on the market is Amazon S3 and in this article, you are going to learn how to get started with it using Python (and boto3 library).
So lets first see how AWS S3 works.
AWS S3 Object Storage
As we have mentioned before AWS S3 is a cloud storage service and its name S3 actually stands for Simple Storage Service. Additionally, AWS S3 is unstructured object storage. What does that mean?
This means that data is stored as objects without any explicit structure such as files or subdirectories. The object is stored directly in the bucket with its metadata.
This approach has a lot of advantages. The flat structure allows fast data retrieval and offers high scalability (if more data needs to be added it is easy to add new nodes). The metadata information helps with searchability and allows faster analysis.
These characteristics make object storage an attractive solution for bigger and smaller companies. Additionally, it may be the most cost-effective option of storing data nowadays.
So, now that you have a bit of background on AWS S3 and object storage solutions, you can get started and create an AWS account.
Creating an Account with AWS and Initiating Setup
In order to create an account, head to AWS and click on create an AWS account. You will be prompted to fill in a form similar to the one below.
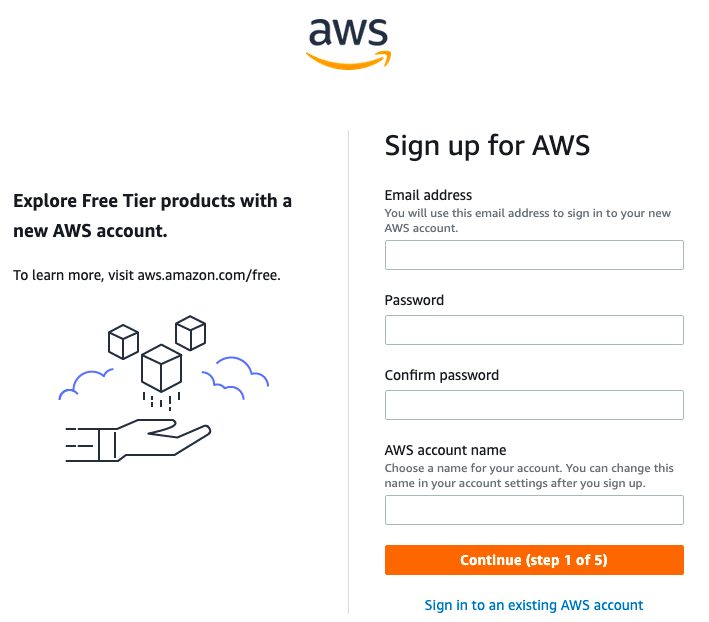
There are currently five steps in the set up so you will need to fill all of them (including your address, personal, and billing information). When asked for the plan you can choose a free one. After completing the signup process, you should see a success message and be able to access the AWS Management Console.
Once you are in the AWS Management Console you will be able to access S3 from there.
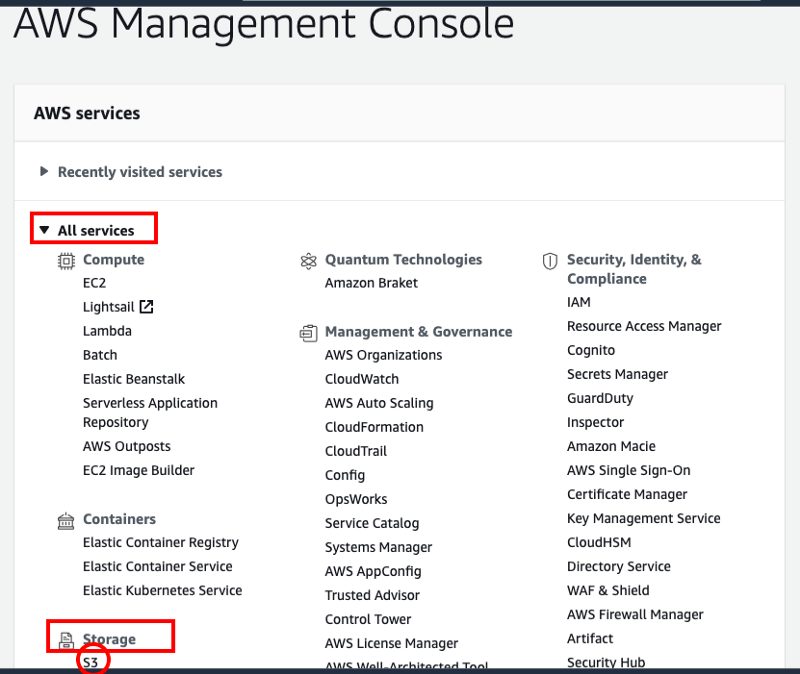
Now you can open S3 and create your first bucket. The name that you choose for the bucket has to be unique across the entire S3 platform. I suggest you use only lowercase letters for the name (e.g. konkibucket). For the AWS region, choose the location closest to you and leave the rest of the settings as default.
Once the bucket is created you should be able to see it from S3.
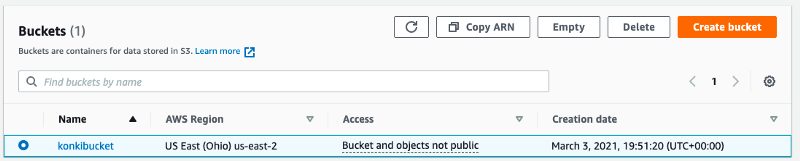
Now you can add and delete files by accessing the bucket via the AWS S3 console.
The next step is to learn how to interact with the bucket via Python and the boto3 library.
Installing boto3
The first step is to use pip to install boto3. In order to do this you can run the following command:
pip3 install boto3
Setup Credentials File with AWS Keys
The next step is to set up a file with AWS credentials that boto will use to connect to your S3 storage. In order to do it, create a file called ~/.aws/credentials and set up its contents with your own access keys.
[default] aws_access_key_id=AKIAIOSFODNN7EXAMPLE aws_secret_access_key=wJalrXUtnFEMI/K7MDENG/bPxRfiCYEXAMPLEKEY
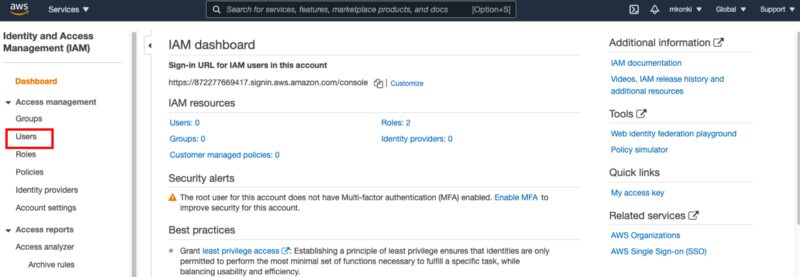
In order to create keys, you will need to head to the AWS Management Console again and select IAM under Security, Identity & Compliance.
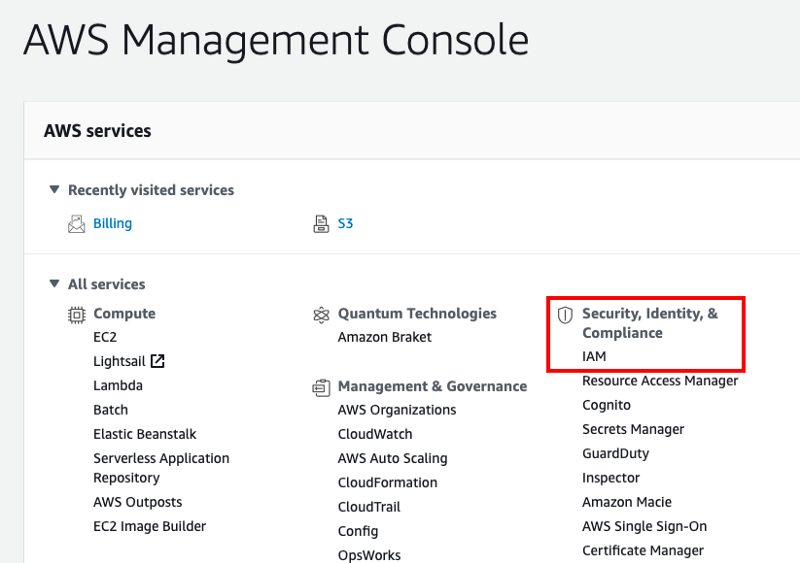
Once in IAM, select the users option as shown in the screenshot below:
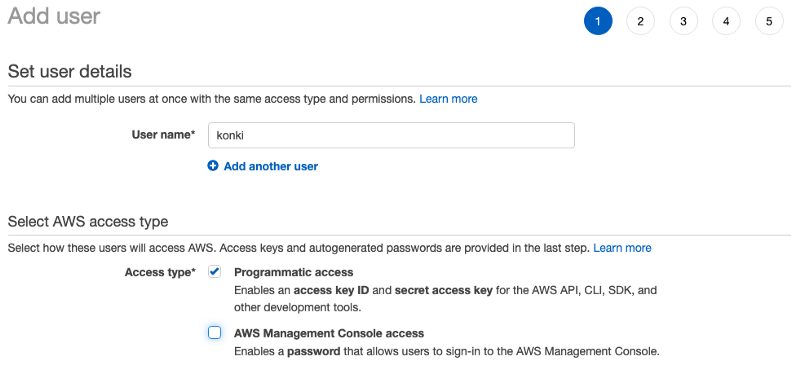
This will lead you to the user management platform where you will be able to add a new user. Make sure you grant a new user programmatic access.
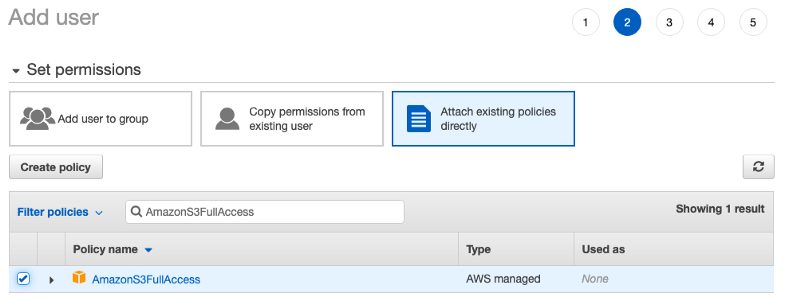
Also, make sure that the user has AmazonS3FullAccess permission.
Once the user creation process is successful you will see the access keys for the user you have created.
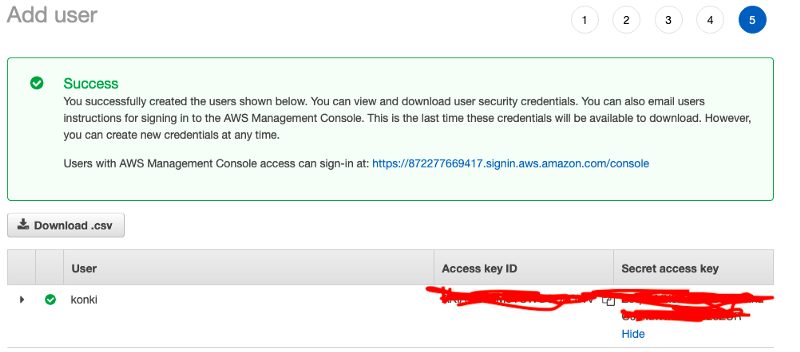
You can now use your credentials to fill in ~/.aws/credentials file.
Once the credentials file is set up you can get access to S3 via this Python code:
import boto3 s3_resource = boto3.resource('s3')
If you want to see all the buckets in your S3 you can use the following snippet:
for bucket in s3_resource.buckets.all(): print(bucket.name)
Uploading a File to S3
Its time to learn how to upload a file to S3 with boto3.
In order to send a file to S3, you need to create an object where you need to specify the S3 bucket, object name (e.g. my_file.txt) and a path from your local machine from which the file will be uploaded:
s3_resource.Object('<bucket_name>', '<my_file.txt>').upload_file(Filename='<local_path_file>')
Yes, its that simple! If you now look at the S3 Management Console the bucket should have a new file there.
Downloading a File from S3
Like uploading a file, you can download one once it actually exists in your S3 bucket. In order to do it, you can use the download_file function and specify the bucket name, file name and your local path destination.
s3_resource.Object('<bucket_name>', '<my_file.txt>').download_file('<local_path_file>')
You have just learned how to upload and download files to S3 with Python. As you can see the process is very straightforward and easy to set up.
Summary
In this article, you have learned about AWS S3 and how to get started with the service. You also learned how to interact with your storage via Python using the boto3 library.
By now you should be able to upload and download files with Python code. There is still much more to learn but you just got started with AWS S3!