
PyTorch is known for being a clean framework, and hence it was a challenging task to achieve the production capability and flexibility needed for research. I think that the major hurdle for pushing production support to the core was going out of Python’s realm and moving the PyTorch model to a faster, thread-safe language that has multithreading capability. But then, that violated the Python-first principle that PyTorch had up to that point.
Serving the PyTorch model in Python itself is the easiest way of serving your model in production. But before going into explaining how it can be done, let’s have a quick look at what Flask is. In this article, we’ll go through the most fundamental concepts of Flask and how this framework is used in the Python world.
This article is an excerpt from the book PyTorch Deep Learning Hands-On by Sherin Thomas and Sudhandhu Passi. This book attempts to provide an entirely practical introduction to PyTorch. This PyTorch publication has numerous examples and dynamic AI applications and demonstrates the simplicity and efficiency of the PyTorch approach to machine intelligence and deep learning.
Introduction to Flask
Flask is a microframework that’s been used in production by several big companies in the Python world. Even though Flask comes up with a template engine that can be used to push the UI to the client, we are not using that; instead, we will make a RESTful backend that serves APIs.
Flask can be installed using pip, just like any other Python package:
pip install Flask
This will install the additional dependencies Werkzeug (the Python interface between the application and the server), Jinja (as the template engine), itsdangerous (for securely signing the data), and Click (as the CLI builder).
Once installed, the user will have access to the CLI and invoking our script with flask run will bring up the server:
from flask import Flask
app = Flask(__name__)
@app.route(“/”)
def hello():
return “Hello World!”
The example has four components in it:
- The first line is where we import the Flask package.
- We make a Flask object, which is our big web application object that will be used by the Flask server to run our server.
- Once we have the application object, we need to store the information about what URL the object should do actions on. For this purpose, the application object comes with a route method, which accepts the desired URL and returns a decorator. This is the URL we want the application to serve now.
- The decorator returned by the application object decorates a function and this function will be triggered when the URL gets a hit. We will name this function hello. The name of the function doesn’t have much importance here. In the preceding example, it just checks for the input and responds accordingly. But for our model server, we make this function slightly complex so that it can accept the input and feed that input to the model we have built. The return value of our model will then be pushed back to the user as an HTTP response.
We start our implementation by making a flask_trial directory and save this file as app.py in that directory:
mkdir flask_trial
cd flask_trial
We start our implementation by making a flask_trial directory and save this file as app.py in that directory:
mkdir flask_trial
cd flask_trial
Then we execute the CLI command that comes with Flask to bring the server up. After the execution, you’ll see the server being served from http://127.0.0.1:5000 if you haven’t given custom parameters.
flask run
We can test the simple Flask application by making an HTTP request to the server location. If everything worked fine, we should get a “Hello, World!” message from the server.
-> curl “http://127.0.0.1:5000”
-> Hello World!
We have set up our simple Flask application. Now let’s bring the fizzbuzz model into our application. This model will be called from the router function. It is a simple neural network based model and we’ll be loading the trained model here:
import torch.nn as nn
import trch
class FizBuzNet(nn.Module):
” ” “
2 layer network for predicting fiz or buz
param: input_size -> int
param: output_size -> int
” ” “
def __init__(self, input_size, hidden_size, output_size):
super(FizBuzNet, self).__init__()
self.hidden = nn.Linear(input_size, hidden_size)
self.out = nn.Linear(hidden_size, output_size)
def forward(self, batch):
hidden = self.hidden(batch)
activated = torch.sigmoid(hidden)
out = self.out(activated)
return out
Model serving with Flask
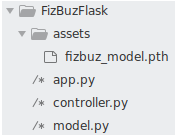
The directory structure of our application is given in the following screenshot. The assets folder has the trained model, which will be used by the controller.py file while loading the model. The app.py in the root location is the entry point for our Flask application. Flask prefers app.py as the default name of the entry point file.
When you execute flask run, Flask looks for the app.py file in the current directory and executes that. The controller.py file is where we are loading the model from the model.py file. The loaded model will then wait for the input from the user through the HTTP endpoint. app.py redirects the user input to controller, which is then converted to Torch tensors.
The tensor object will be passed through the neural network and controller returns the result from the neural network after passing it through the post-processing operations.
 The current directory
We have four components in our directory for making the Flask app. The assets folder is where we kept our model. The other three files are where the code resides. Let’s look into each of those. We’ll start with our entry file, app.py. It is an extended version of the simple Flask application given earlier. The file taught us how to define the URL endpoint and how to map a URL endpoint to a Python function. Our extended app.py file is shown in the following code block:
import json
from flask import Flask
from flask import request
import controller
app = Flask(‘FizBuzAPI’)
@app.route(‘/predictions/fizbuz_package’, methods=[‘POST’])
def predict():
which = request.get_json().get(‘input.1’)
if not which:
return “InvalidData”
try:
number = int(which) + 1
prediction = controller.run(number)
out = json.dumps({‘NextNumber’: prediction})
except ValueError:
out = json.dumps({‘NextNumber’: ‘WooHooo!!!’})
return out
Flask gives us request utility, which is a global variable but local to the current thread that stores information about the current request. We use the get_json function of the request object to get the body POST parameters from the request object. String data that came through HTTP is then converted to an integer. This integer is the number we are passing from the frontend. Our application’s task is to predict what the state will be of the next number. Will that be the next number itself or fizz, or buzz, or fizz buzz? But we train our network to predict the status of the number we pass. However, we need the status of next number. So, we’ll add one to the current number we got and then pass the result to our model.
The next import we have is controller, where we have loaded our model file. We are calling the run method and pass the number to the model. The predicted value from controller is then passed back to the user as a dictionary. Flask will convert that to a response body and send it back to the user.
Before moving forward, there are two more main differences we could see in the extended version from the previous simple Flask app. One is the URL routing: /predictions/fizbuz_package. As we have seen before, Flask allows you to map any URL endpoint to a function of your choice.
Secondly, we used another keyword argument in the decorator: methods. With that, we are telling Flask that this function needed to be called not only by the URL rule, but also only on the POST method call on that URL. So, we run the application with flask run, like we did before and we test it with our curl command.
-> curl -X POST http://127.0.0.1:5000/predictions/fizbuz_package \
-H “Content-Type: application/json” \
-d ‘{“input.1”: 14}’
-> {“NextNumber”: “FizBuz”}
In the HTTP POST request, we are passing the JSON object with the input number as 14 and our server returns the next number as FizBuz. All of that magic happens in the controller.run() method our app.py is calling. Now let’s see what that function is doing.
Next is the controller file with the run() method. Here we convert the input number to a 10-digit binary and make it a Torch tensor. The binary tensor is then passed to our model’s forward function to get the 1 x 4 tensor that has the prediction.
Our model is made by calling the FizBuz class from the model file loaded with the saved .pth file. We use Torch’s load_state_dict method to load the parameters to the initialized model. After that, we convert our model to eval() mode, which sets the model to evaluation mode (it switches off batchnorm dropout layers in the evaluation mode). The model’s output is the probability distribution on which we run max and figure out which index has the maximum value, and then convert that to readable output.
A production-ready server
This is a very basic walkthrough of how we can deploy a PyTorch model to a server using Flask. But Flask’s inbuilt server is not production-ready and should only be used for development purposes. Once the development is done, we should use some other server package to serve our Flask application in production.
Gunicorn is one of the most popular server packages used by Python developers and it is so easy to bind it with the Flask application. You can install Gunicorn using pip, like how we installed Flask:
pip install gunicorn
Gunicorn needs us to pass the module name for it to pick up the module and run the server. But Gunicorn expects the application object to have the name application, which is not the case with our project. Hence, we need to explicitly pass the application object name along with the module name. Gunicorn’s command-line tool has numerous options, but we are trying to make it as simple as possible:
gunicorn app:app
import torch
from model import FizBuzNet
input_size = 10
output_size = 4
hidden_size = 100
def binary_encoder():
def wrapper(num):
ret = [int(i) for i in ‘{0:b}’.format(num)]
return [0] * (input_size – len(ret)) + ret
return wrapper
net = FizBuzNet(input_size, hidden_size, output_size)
net.load_state_dict(torch.load(‘assets/fizbuz_model.pth’))
net.eval()
encoder = binary_encoder()
def run(number):
with torch.no_grad():
binary = torch.Tensor([encoder(number)])
out = net(binary)[0].max(0)[1].item()
return get_readable_output(number, out)
In this article, we have gone through the easiest approach to take PyTorch to production, using Flask, Python web framework. A setup such as Flask is good enough, especially if you are setting up a sample web app or something for your personal needs, or for similar use cases.
About the Author
Sherin Thomas started his career as an information security expert and shifted his focus to deep learning-based security systems. He has helped several companies across the globe to set up their AI pipelines and worked recently for CoWrks, a fast-growing start-up based out of Bengaluru. Sherin is working on several open source projects including PyTorch, RedisAI, and many more, and is leading the development of TuringNetwork.ai.
Sudhanshu Passi is a technologist employed at CoWrks. Among other things, he has been the driving force behind everything related to machine learning at CoWrks. His expertise in simplifying complex concepts makes his work an ideal read for beginners and experts alike. This can be verified by his many blogs and this debut book publication. In his spare time, he can be found at his local swimming pool computing gradient descent underwater.