

In this article, we cover How to install MLflow. Before we dive into the process, let’s begin with introducing MLOps
MLOps
By definition, MLOps is a cross-functional, collaborative, and continuous process that focuses on operationalizing data science use cases by managing statistical, machine learning models as reusable, highly available software artifacts via repeatable deployment process.
MLOps covers aspects such as model inference, scalability, maintenance, auditing, monitoring, and governance of models in an order that they deliver positive value even as underlying conditions (variables) change.
Why MLOps is important?
MLOps has grown into prominence to help organizations reduce the risk associated with Data Science, AI, and ML initiatives and maximize returns on analytics.
Running ML models and managing their lifecycle needs continuous comparison of the performance of model versions and detection of model drifts, as and when they occur. Manual ML tracking methods pave way for too many blind spots when dealing with scores of model runs. This is where MLOps streamlines end-to-end ML lifecycle management.
MLOps helps Data Scientists
Instantly identify and deal with gaps in deployment, CI/CD, drift, and monitoring model performance
Focus more on algorithms, building accurate models, and improving their performance, by automating the process of deployment, serving and re-training of models
MLOps with MLflow
While there are multiple platforms to manage MLOps, lets focus on MLflow, a popular open-source platform to streamline machine learning development (Tracking experiments, packaging code into reproducible runs, sharing and deploying models).
MLflow is a Machine Learning Operations platform that offers a set of lightweight APIs that can be used with any existing machine learning application or library (Ex: Tensorflow, PyTorch, XGBoost, etc).

5 reasons why MLflow is the best MLOps platform
Before we get to the MLflow installation, lets take a look at the key advantages of using MLflow as a platform:
Reproducibility, extensibility, and experimentation under a single roof
Works with any ML library, algorithm, deployment tool or language
Brings transparency and standardization when it comes to training, tuning and deploying ML models
Easy comparison of performance metrics or model parameters Available as tables and graphs with visualization
Experiments are highly scalable even with a lot of models. Collaborators can look for models through tags, developer name or accuracy levels
MLflow installation: Pre-requisites
A tracking server, to allow us to access a UI to track the model’s lifecycle
Backend storage, to record metrics, parameters, and other metadata
An artifact root to store models and custom objects that we choose
Mlflow Setup
In order to install MLflow, create a virtual environment using below code:
conda create –name mlflow python=3.6
conda activate mlflow
After creating the virtual environment, install MLflow using the code below-
conda install -c conda-forge mlflow (or) Pip install mlflow
In this case, local storage on a personal system is used as the tracking server. Once MLflow is installed, create a python file say sample.py by using the below code:
import os
from random import random, randint
from mlflow import log_metric, log_param, log_artifacts
if __name__ == “__main__”:
# Log a parameter (key-value pair)
log_param(“param1”, randint(0, 100))
# Log a metric; metrics can be updated throughout the run
log_metric(“foo”, random())
log_metric(“foo”, random() + 1)
log_metric(“foo”, random() + 2)
# Log an artifact (output file)
if not os.path.exists(“outputs”):
os.makedirs(“outputs”)
with open(“outputs/test.txt”, “w”) as f:
f.write(“hello world!”)
log_artifacts(“outputs”)
Create a folder and save sample.py file in the folder.
In Anaconda prompt, mention the path of the folder where we have saved sample.py file. After this, the file can be run as shown below:
python sample.py
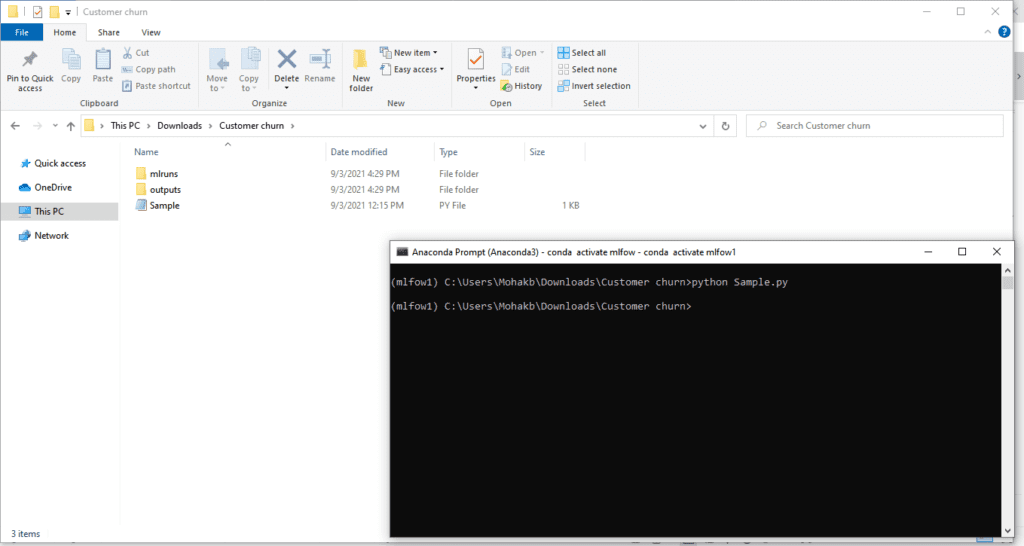
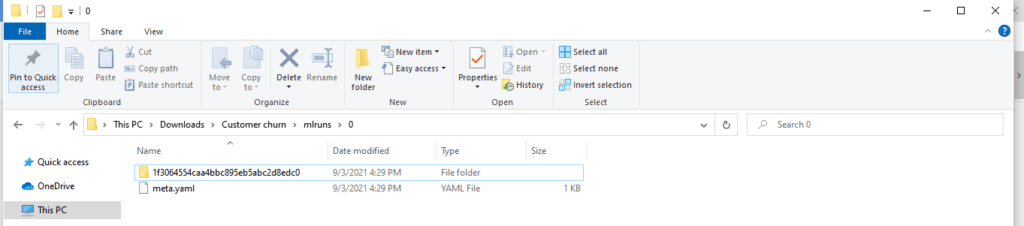
A folder named ‘mlruns’ gets created automatically after running sample.py file. All the information about different runs and artifacts get saved in this folder.
We can then view Mlflow UI by using below command in the Anaconda prompt.The below link is used to launch: http://localhost:5000/
Mlflow UI
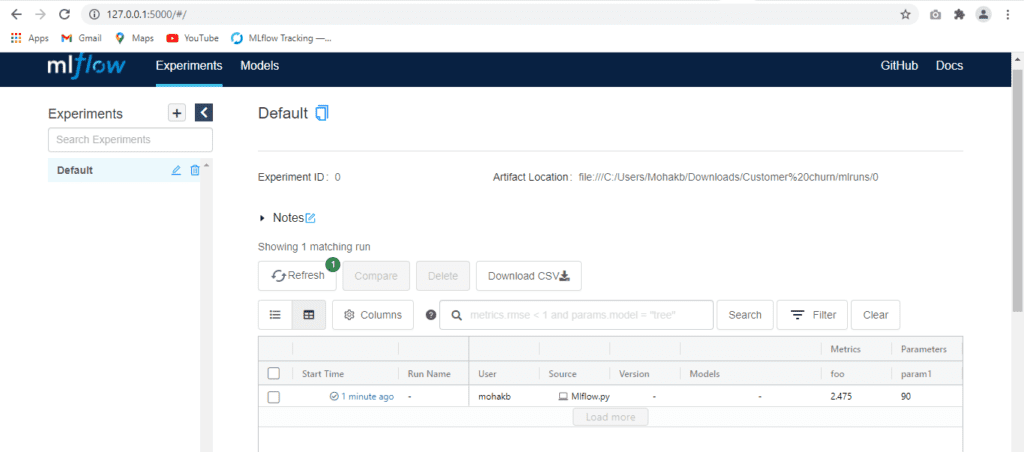
On the left panel, all Experiments can be seen and grouped as different runs of the same problem.
The MLflow UI as we see can be used to train and log models through MLFlow tracking (which allows us to visualize, search and compare runs, download & run artifacts or metadata for analysis with other tools). More on it in future articles.
This was about how to install MLflow. In our next article, we cover how to implement MLOps using MLflow. To read more such articles on MLOps, Visit our Blogs section.
Author

Mohak Batra
Mohak Batra is an associate scientist of Data Science Practice at GainInsights and can be reached at [email protected]