
What is R Shiny App?
R shiny app is an interactive web interface. R shiny app has two components user interface object (UI.R) and server function (Server .R). The two components are passed as arguments to the shiny app function that creates a shiny app object. For more info on how to build Shiny apps please refer this link
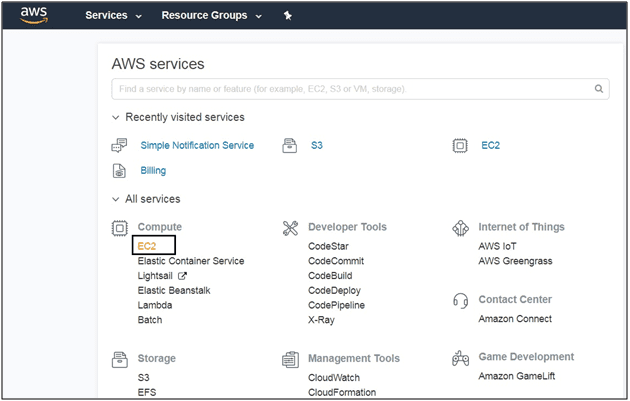
Step 1: Create an EC2 instance
Log in to AWS account, click on EC2 under the ‘Compute’ header or click on EC2 under ‘Recently visited services’
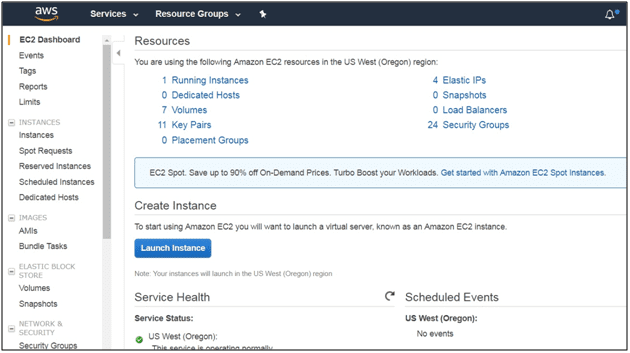
Click on Launch Instance
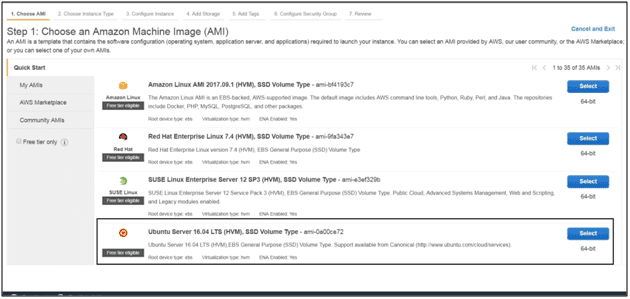
Choose a Machine Image of your choice, here I have chosen Ubuntu server 16.04 LTS (HVM)
Choose an Instance type; one can start out with t2.micro, t2.small or t2.medium instances. For larger apps one can use t2.large and beyond.
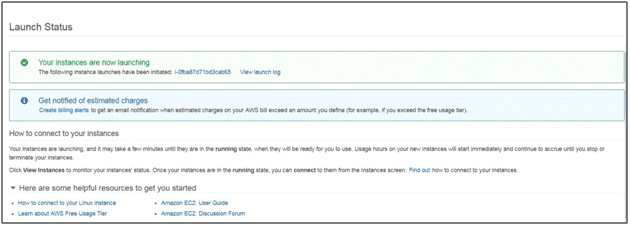
Then click on launch instance, you will then be directed to the below page

Click on Edit security groups, you will be directed to below page (Configure security group).
In the SSH row, change source to ‘My IP’
Click on add a Rule, custom TCP Rule would be added. Under the ‘Port range’ enter 3838. This is the port for R shiny server.

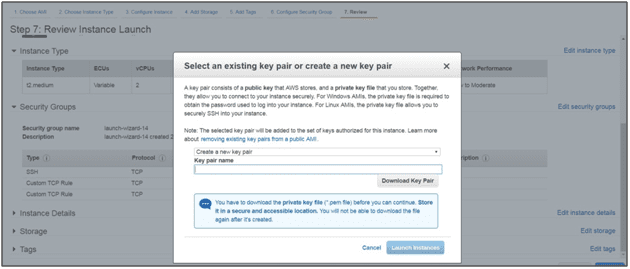
Click ‘Review and Launch’ and then click ‘Launch’. Upon doing this you will get a dialogue box like below. The dialogue box helps in creating a private key which will enable us to ssh into the EC2 instance. Give a name to the key and click ‘Download Key Pair’. You will get .pem file. Save the .pem file/key securely.
Press Launch Instances. You will get a screen like below
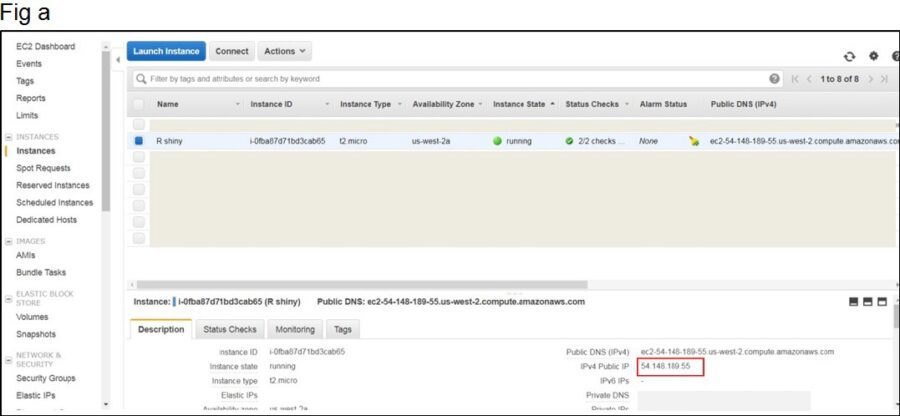
If the instance is created successfully, the instance state will show ‘running’
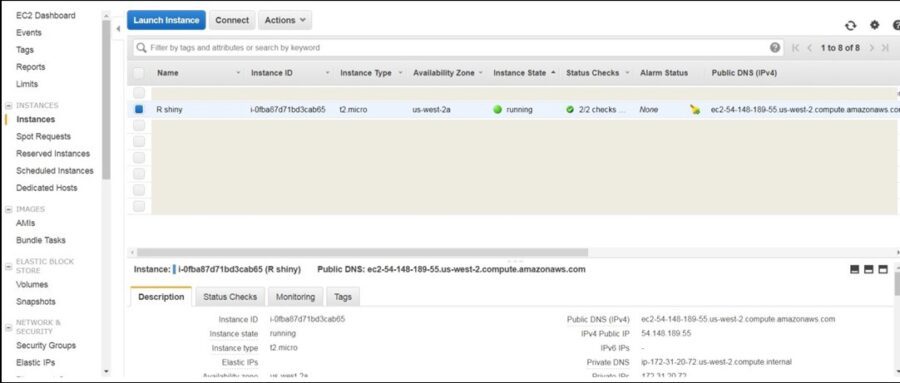
Copy the IP address under public DNS (IPv4), this will be form the basis of our URL to host the R shiny app later.
Step 2: Access the EC2 instance via SSH from Putty (Windows based)
Download putty, after downloading, convert the .pem file into ppk file.
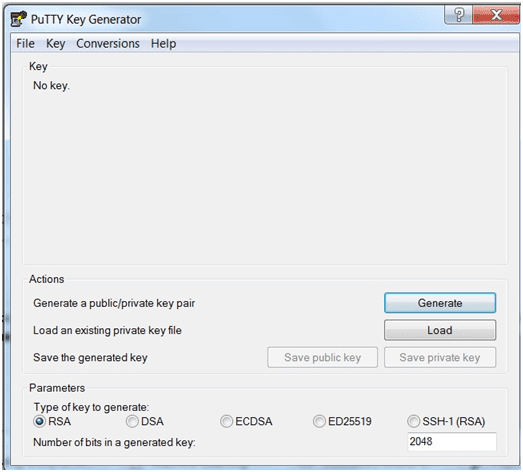
To convert .pem file to ppk, type puttygen in the windows start dialog box. Click on ‘puttygen’. The below box should appear.
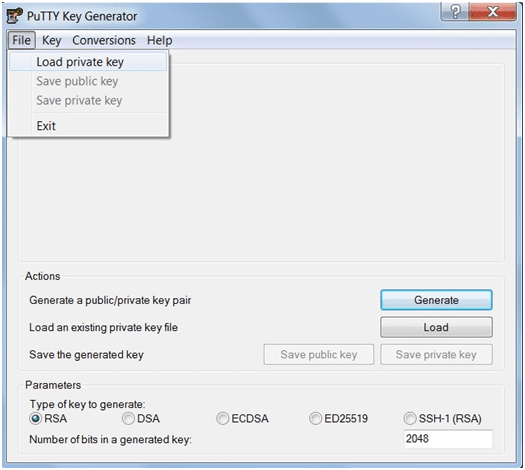
Click on File tab and click on load ‘private key’.
Navigate to folder or path where you have saved the .pem file and select it. The .pem file will be imported and you should see a screen like below.
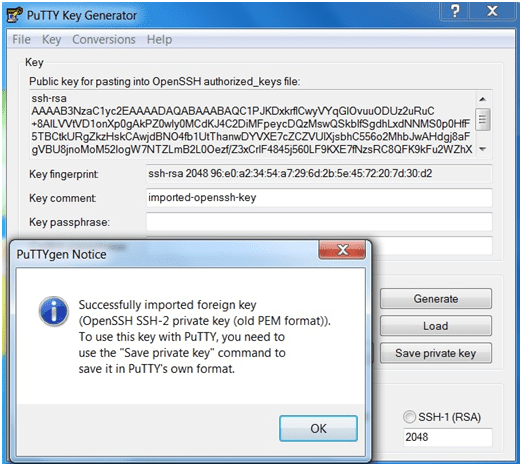
Now save the key as ‘save private key’, give a name to key and save it in your desired location. Upon saving the key the below icon should appear.

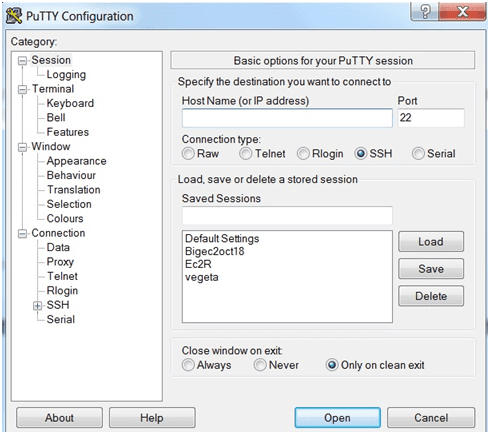
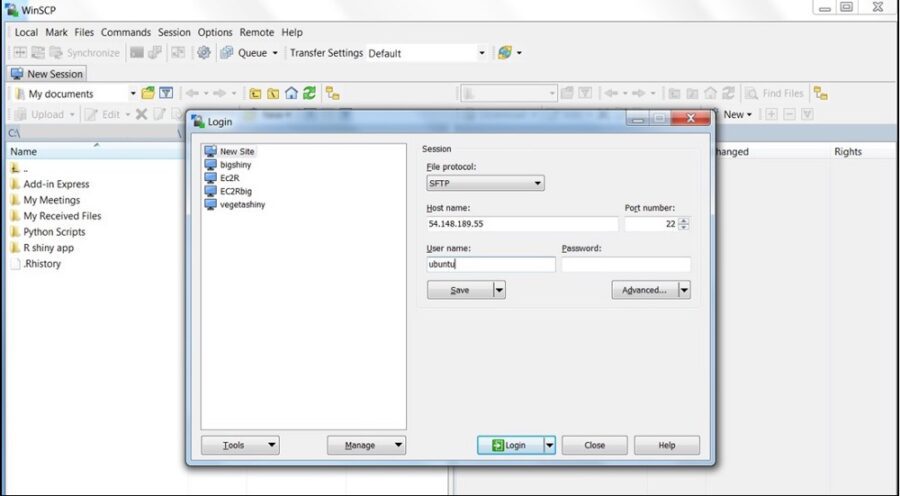
Open putty and in the host name box enter the IP of EC2 instance i.e. one adjacent IPv4 Public IP (54.148.189.55) as shown in Fig a
Next navigate to ‘Auth’ on the left hand side panel and browse for the ppk key that you had saved earlier.
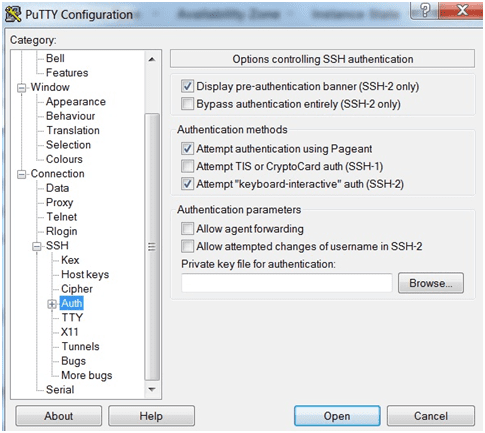
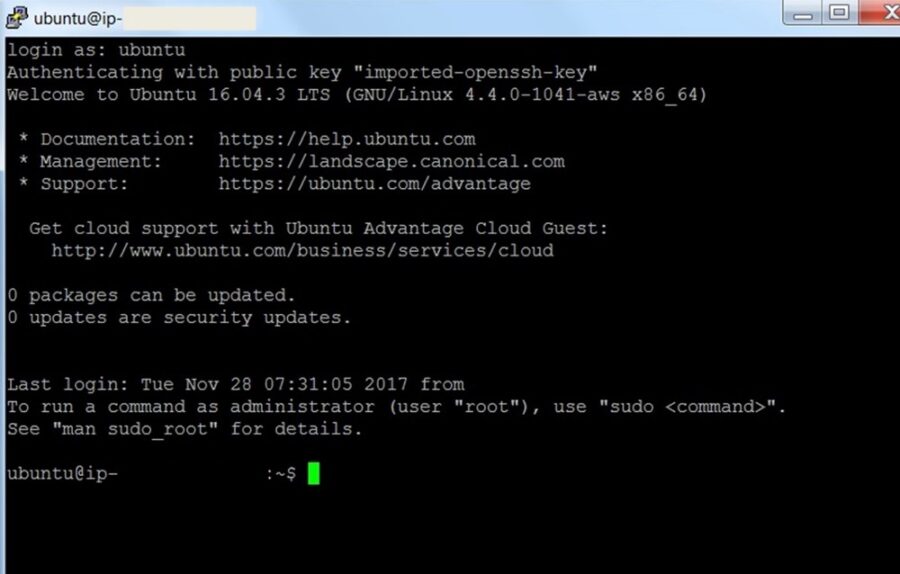
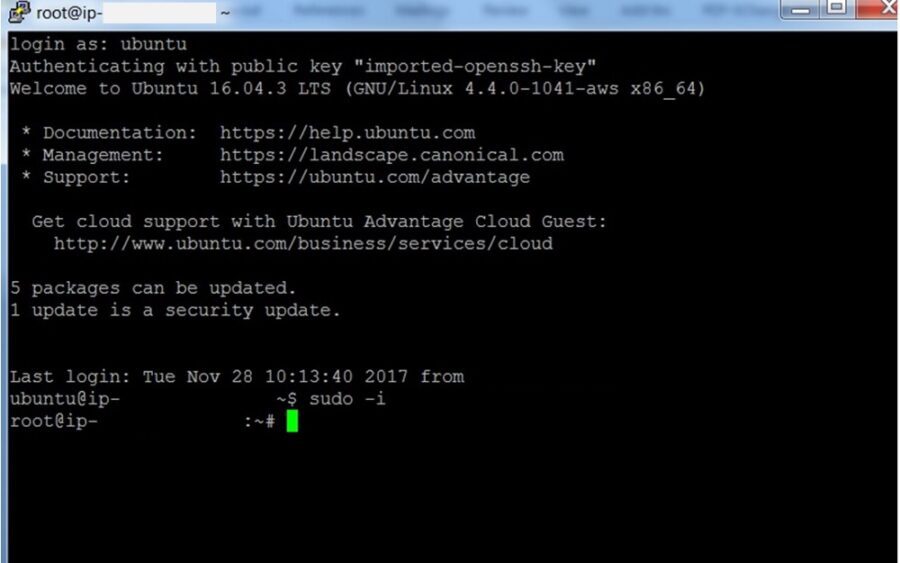
After browsing the ppk key click open. If your key is a valid one you will get a command prompt screen like below. Enter your log in credentials and then press enter
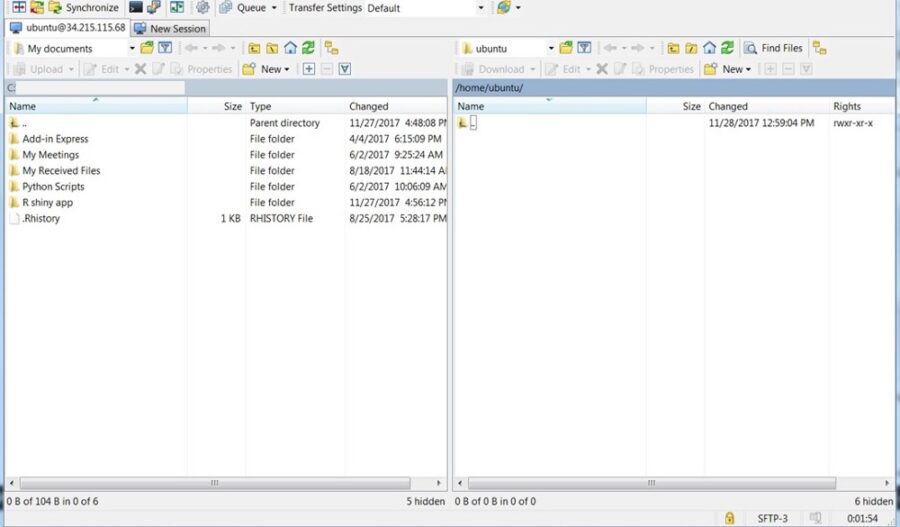
Step 3: Install WinSCP to transfer files from host machine to EC2 instance to vice versa
Enter the IP address of EC2 instance in the host name box. The click on ‘Advanced’.
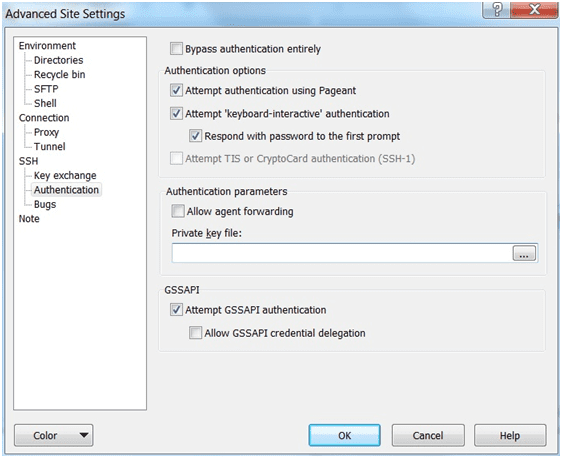
Navigate to the left hand side panel and under SSH click on ‘Authentication’, enter the private key as shown below
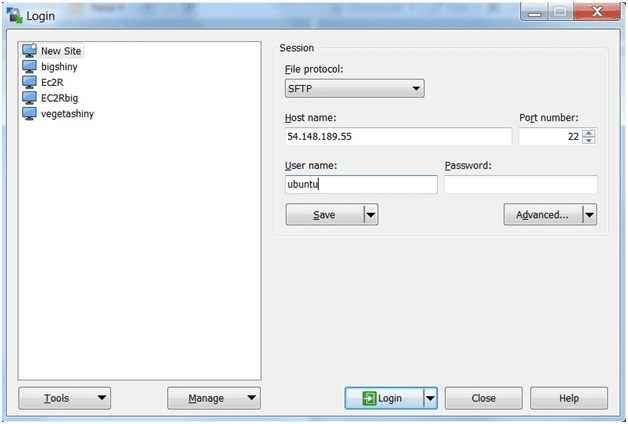
After entering the private key click ok. You will get the below screen. Click on ‘Login’.
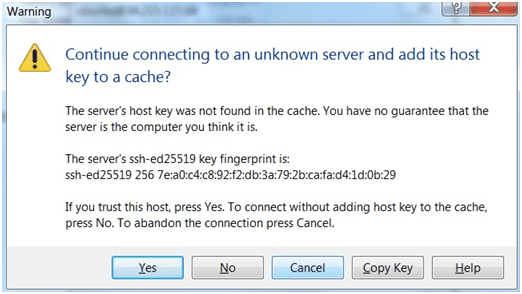
You will get a dialog box like below. Just click ‘Yes’.
The final result will be the screen below
Step 4: Installing R base and R shiny server in EC2 instance.
The first prerequisite to run R shiny app is to install r base, shiny server, shiny package and associated packages.
To install the above, the first step is to go to the root and install them. The reason being if you are logged in as non root user in Ec2, you will have your own library path and probably the R packages, r base, shiny server may not get installed system wide. To install it system wide, go to root and install the above
Steps to go to root:
In the prompt type the below
sudo –i
You should then get a # symbol like below
Now run the following commands
sudo apt-get update
sudo apt-get install r-base
sudo apt-get install r-base-dev
The below command installs R shiny package
sudo su — -c “R -e \”install.packages(‘shiny’, repos = ‘http://cran.rstudio.com/‘)\””
The below command installs shiny server
wget https://download3.rstudio.org/ubuntu-12.04/x86_64/shiny-server-1.4.4.807-amd64.deb
sudo dpkg -i shiny-server-1.4.4.807-amd64.deb
Step 5: Transfer the R shiny components
After execution of above steps a directory(folder) by the name ‘shiny-server’ would have been created in the path /srv/shiny-server/
The next step is to create a folder inside the directory shiny-server where we can place our R shiny app components (UI.R